- Homepage (this page)
- Tech Site
- Old Funny Site
CategoriesAdsSyndicate This Blog |
RV Expansion Tank Installation in the trailerSaturday, August 15. 2009 Problem: the water pump pulses on-and-off to maintain water pressure. It does a decent job, but it's noisy and the water flow varies every second or two. Problem: the water pump pulses on-and-off to maintain water pressure. It does a decent job, but it's noisy and the water flow varies every second or two. Solution: install an expansion (accumulator) tank that will accumulate pressure and reduce the need for the pump to cycle or even turn on. After some preliminary research, I ordered the parts and installed it in 2 hours (including some performance testing). Here is the how-to, largely for me to remember how I did it. 1) Since I have PEX plumbing and I was going to cut into it, I ordered some blue pex.
2) I wanted to use as much plastic as possible, both to minimize weight and in the hopes of better freeze-tolerance. The only thing I really wanted to be solid and metallic was the tank mounting elbow. Unfortunately, I couldn't find a thread-to-thread elbow with ears, so I settled for making my own by sweating together a sweat to thread elbow and a sweat to thread adapter. Shopping ListI ordered everything (except the brass) from plumberstock.com: They shipped everything I asked for, although I found it odd that they a) never sent me a single email and b) sent a different model tank than the Watts PLT-5 I thought I was ordering. Upon closer inspection, the title of the item includes "TS-5" also, which is made by someone else. Oh well, it works - who cares. 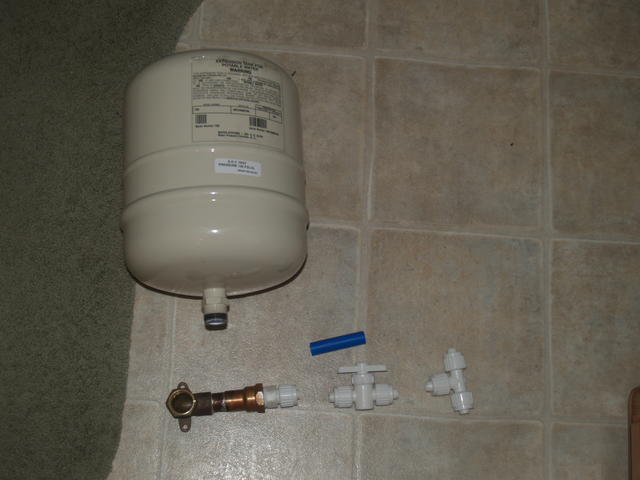 The parts Of course that's not a 10 foot long piece of PEX in the photo. The only things that aren't from plumberstock are the brass elbow and thread adapter. LocationGotta figure out where to stick the tank. Since it's about 14" tall with the elbow, it fits upright under the bed. I want it upright so that it's easy to drain for winter. Here is what the area looks like: 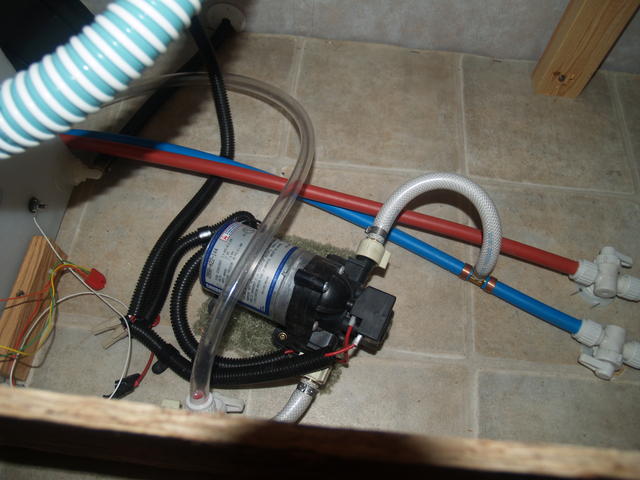 Original Layout For optimal pex routing (and minimal bending) I decided to stick the tank by the wheel well. I raised it slightly (have enough headroom) to aid in drainage. 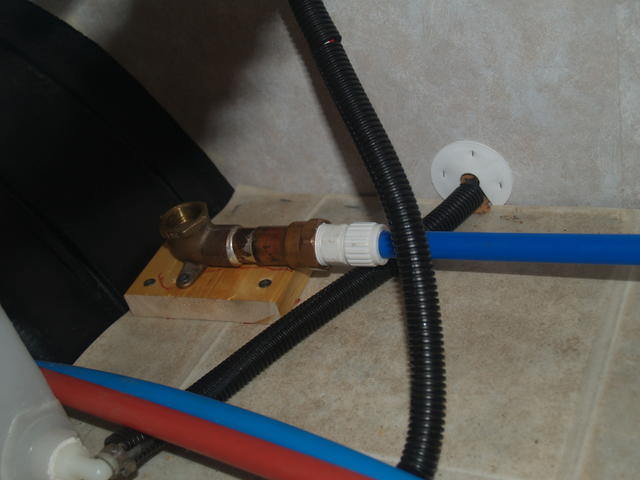 Tank receptacle I got the tank almost flush by the wall - then I stuffed a little bubblewrap behind it and zip-tied it to the surrounding beams, immobilizing it should it decide to break off the fitting due to road stress. Zip ties are not shown. 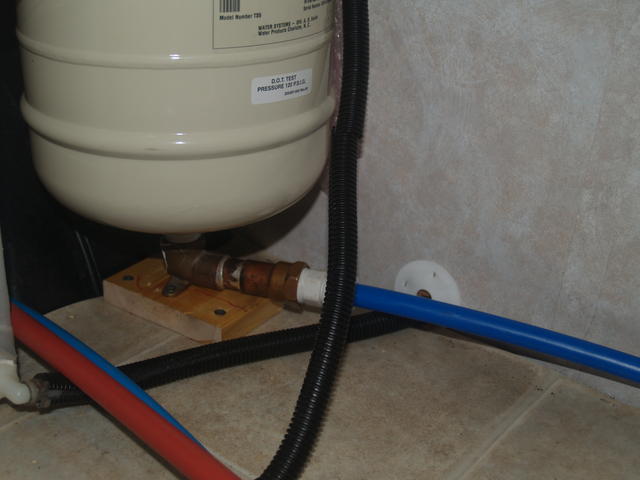 Now it was time to cut into the plumbing (cold water, blue, not red!). The Flair-IT fittings are surprisingly easy to work with - push on (takes some force), screw on (takes a LOT of force and some friction burns on your hand). I used expanding pliers to tighten it, though I suspect I'm not supposed to use tools on this stuff. I was able to cut pex with a utility knife (it seemed better than metal snips or a hacksaw). And here it is all connected. The valve allows me to shut off the tank when winterizing (so I don't fill it with 2 gallons of antifreeze), and to compare system behaviour without the tank. 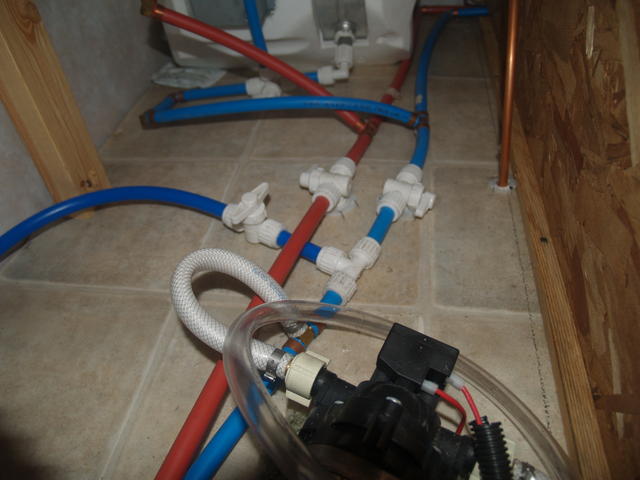 All hooked up PerformanceThe tank is pre-charge adjustable, meaning that the air pressure can be changed. It came pre-charged at 35psi, which seemed excessive, considering that the water pump is probably only rated at about 40psi. I decreased it to 27, but when installed, it was still too much - water did not go into the tank. I then just bled off air until water started to come in, which was about about 25psi or lower. Note that measuring the pressure is only useful when there is no water pressure (drain system). So I did some testing to see what the optimal pressure was: 25 psi: tank takes some water, faucet runs 10 seconds before pump turns on, 10 seconds after to refill 20 psi: tank takes more water, faucet runs 20 seconds before pump turns on, 15 seconds after to refill 17 psi: tank takes much water, faucet runs 22 seconds before pump turns on, 17 seconds after to refill Additionally, I ran the faucet with the pump disabled to see how long water will flow before pressure is used up, and for the 3 pressures I tried, the times were: 18s, 30s, 45+s (before pressure drop was significant). At 17psi the water pressure was somewhat lower while the system ran without the pump, so I did not go lower. All the testing was done with hot+cold water on full-blast at the kitchen faucet, after bleeding the system at all faucets and allowing the pump to repressurize fully. SummaryIn summary, the modification does what it's supposed to - the faucet/shower pressure is now consistent (it was wave-like before), and the pump runs smoother, and much less frequently. The pump still makes considerable noise and vibrates a lot, but I think that's quite normal for it. Additionally you could say that I increased the water capacity by a gallon or two, as long as I pressurize the system and top off the fresh water tank Trackbacks
Trackback specific URI for this entry
'Coffee Bar' design by David Cummins powered by Serendipity |
